LOGGER8-USB: 8 Channel USb Sensor Reader Buy Now
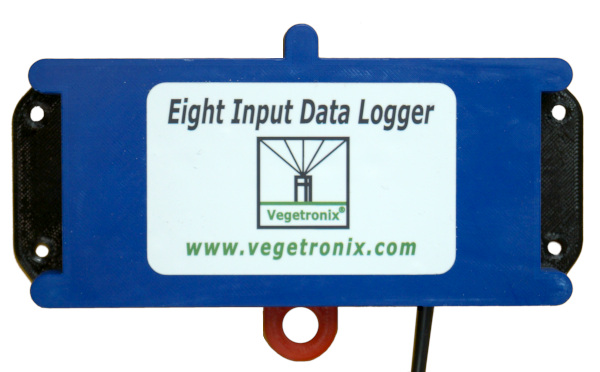
This low-cost no-frills data logger is perfect for reading up to 8 Vegetronix soil moisture sensors. It reports sensor data back to a host computer via USB, or it can run stand alone and store data to non-volatile memory, for later retrieval.
Quick and Easy Setup
Setup is very quick. Just insert sensor wires into it's terminal blocks. When connected via USB, the device is powered from the USB cable. It can also be powered from batteries with a wide supply range of 5 to 24V.
Each sensor channel uses 3 spots on the terminal block: for power, ground and the sensor input. The logger will turn on power to all sensors simultaneously with a programmable setup time.
Works With Any Serial Terminal Program
The device looks like a serial port to host PC systems so any communications software program can be used to control it and gather data. We've created an Online Serial Terminal Application that allows your browser to access the logger, and send it commands. You can also use other serial terminals such as CoolTerm.
Manipulate Data With Any Spread Sheet Program
Data is returned in comma separated format, for easy manipulation in spread sheet programs. Here's an example output file: LoggerFormat.txt. You can cut and paste data received by our Online Serial Terminal Application into a text file. You can specify unit labels for each channel, and each channel can be calibrated with a 2 to 10 point calibration curve for non-linear devices.
Rugged Weather Resistant Case
The logger consists of 2 parts: an outer shield and an inner box with the electronics and terminal blocks. The outer shield is rain and weather resistant and protects the inner electronics. To access the terminal blocks you pull on a tongued part that releases the inner logger. See the above video for details.
The box is flanged for easy wall mounting.
Works With Any Analog Voltage Sensors
The logger can be used with sensors other than our soil moisture probes, so long as the sensors output less than 3.3V. For sensors with a higher output voltage, a simple resistor divider can be used to scale the voltage to appropriate levels for the logger.
Extremely Long Battery Life
The logger normally consumes only 5.1mW when it is not sampling data, so it is perfect for battery powered applications.
Features
- Rugged weather resistant case.
- Monitors up to 8 sensors.
- Streams data to a PC, or saves to internal non-volatile memory.
- Real time clock.
- Low power for battery powered operation.
- Low cost.
- Compact.
- Flanged box for easy wall mounting.
- Can be powered from USB port, or from a secondary source.
- Upgradeable firmware through USB port.
- Each channel can be calibrated with up to a 10 point curve.
- Works with: Windows, Linux, and Apple OS.
Applications
- Sprinkler and irrigation systems.
- Greenhouse automation.
- Home automation systems.
- General purpose data logging.
- Crop Steering.
Pricing and Ordering Info
We ship to nearly EVERY COUNTRY on the planet, directly to you from our factory.
99% of orders ship same day.
| BUY NOW FROM OUR WEBSITE STORE | |||
| Part Number | Description | Price | Purchase |
|---|---|---|---|
| LOGGER8-USB | Soil Moisture Sensor Data Logger with 8 inputs. | Buy Now | |
| BH-AA-9V | 9V battery holder with snap clip. Holds 6 AA batteries. | Buy Now | |
Other Vegetronix Products of Interest
- LOGGER8-RS232
- VH400 Soil Moisture Probes
- VegeHub Garden Sensor WiFi Hub
- Relay Boards
- Water Level Sensors
- Soil Temperature Sensors
- Voltage to Current Loop Translators
- SDI-12 Sensor Engine
- SDI-12 to RS232 Translator
- SDI-12 to USB Translator
- Soil Moisture Meter
- Universal Sensor Display
- Relative Humidity (RH) Sensors
Specifications
|
LOGGER8-USB |
|
| Power consumption | 5.1mW @ 6V |
| Sample Bits | 10 |
| Supply voltage | 5V from USB cable, or external 5 to 24V supply |
| Dimensions | 5.0"x2.5"x1.0" (12.7cm x 6.35cm x 2.54cm) |
| Number of sensor interfaces | 8 |
| Maximum sensor input voltage. | 0 to 3.3V |
| Voltage to Sensors | Same as Voltage input to unit. |
| Memory | 91,900 8 channel records. |
| baud rate | 115200 |
| Temperature Range | -40°C to 85°C |
| Enclosure | Wall mounting bracket. Not waterproof. |
| Operating Systems: | Windows, Linux, and Apple OS |
Software Setup
A serial communications program must be used to access the logger. While the logger will work with most any serial communications program, we recommend using our Online Serial Terminal Application that can be run from a Chrome or Edge browser.
When you plug a USB Comm device into your computer it will randomly assign a comm port number. To determine which comm port the device has been assigned to do the following:
- Open Windows device manager. This can be access through the control panel.
- Plug in the USB device. You should see the device under the tree node labeled: "Ports (COM & LPT)"
- When you un-plug the USB device, that device should disappear. You now know the correct comm port number.
If you are using Windows 10 you may need to download the latest USB driver from Prolific: Prolific - Windows USB Driver
Now that you have the correct comm port number for the device, connect to it with our Online Serial Terminal Application from your browser (Chrome or Edge). Select Logger8, and press the connect button and select the correct comm port that you determined from the steps above.
If you're using a different serial port terminal app, then you'll need to configure it with the following options:
- Select the comm port that you determined from the steps above.
- Set the Baud Rate to 115200. (Note if you have Rev 1.00 of the software the baud rate is 9600.)
- Data bits should be 8.
- Stop bits should be 1.
- Parity should be none.
- Flow Control should be none.
- Select "Append CR".
Commands
Data in flash memory is stored as a circular queue. When the memory is full, newer data will overwrite older records.
When the logger powers on. It may take up to 20 seconds for it to initialize the flash memory.
The default sample rate is once per minute. Power is applied across all sensor channels, and they are sampled at the same instant.
The Logger may be configured, controlled and monitored by using the following commands. <CR> designates a carriage return.
| h<CR> | Displays the help menu. |
| v<CR> | Displays the current software version. |
| o<CR> | Toggle the streaming of data output, on or off. The default is to stream data out. |
| d<CR> | Returns the current date. |
| d [DD/MM/YYYY]<CR> | Sets the current date. Example: d 25/12/2013 |
| t<CR> | Returns the current time. |
| t [HH:MM:SS]<CR> | Sets the current time. Example: t 13:21:00 |
| b<CR> | Enable or disable the heartbeat LED. The purpose of the heart beat LED is to let you know that the board is running. The reason you would turn off the LED would be to conserve battery power. |
| u [sensor index] 'string[5]'<CR> | Sets the units of measurement for designated probe. Probes are numbered 1 to 8. Single quotes are necessary around the string. Use an empty string to remove units. For example ''. Example for unit of volts: u 1 'V' |
| p [secs]<CR> | Sets or returns the sensor power on time before sampling in seconds. This allows power to stabilize before sampling the sensors. All sensors are powered together. Example of 10 seconds: p 10 |
| c [sensor index]<CR> | Returns the probe calibration table for the specified sensor. |
| c [sensor index] clear<CR> | Clear the probe calibration table for the specified sensor. When no table is used the raw voltage sensed is returned. |
| c [sensor index] (X,Y)<CR> | Sets the probe calibration table. X is sensor voltage, Y is mapped value. From 2 to 10 points may be entered into the calibration table for each sensor.To enter multiple points just reinvoke this command for each point for the selected sensor. The logger will automatically sort the points by voltage. |
| s<CR> | Gets the sample period in minutes and seconds. |
| s [MM:SS]<CR> | Sets the sample period in minutes and seconds. Use 00:00 to turn off sampling. Example of 10 second sample period: s 0:10 |
| e [Sensor index]<CR> | Toggles enable/disable for a designated sensor. |
| get<CR> | Retrieve all valid data starting with the oldest valid record and ending with the newest record. We use a slow baud rate to conserve power. Retrieving all data in the internal flash memory, may take up to an hour.Use a "q<CR>" to terminate this command. |
| dump<CR> | Dump all valid records stored in flash, in non-sequential order. This command normally is not invoked. Because of the slow baud rate, this command may take up to 2 hours. The only way to terminate the command before it completes is to remove power from the logger.Use a "q<CR>" to terminate this command. |
| del<CR> | Delete all data in the internal memory. |
| wipe<CR> | Erase all flash memory. Use this to purge old data. |
Calibration Table and Units.
One of the cool features of the reader is how each channel can be programmed with up to a 10 point calibration table, so that the sensor can be linearized. If no calibration table is entered for a given sensor channel the reader returns the voltage for the channel.
If your sensor is linear, then only 2 calibration points are required. For example if 0.0V maps to 0, and 3V maps to 1.5 you would set up the calibration using the following command for sensor 2:
c 2 (0,0)<CR>
c 2 (1.5,3.0)<CR>
In addition, you can specify the units for each channel as a string.
Wiring Table
| Terminal Block TB1 (Sensor Inputs 1 and 2) | |
|---|---|
| Pin | Description |
| 1 | Sensor 1: Power |
| 2 | Sensor 1: Input |
| 3 | Sensor 1: Gnd |
| 4 | Sensor 2: Power |
| 5 | Sensor 2: Input |
| 6 | Sensor 2: Gnd |
| Terminal Block TB2 (Sensor Inputs 3 and 4) | |
|---|---|
| Pin | Description |
| 1 | Sensor 3: Power |
| 2 | Sensor 3: Input |
| 3 | Sensor 3: Gnd |
| 4 | Sensor 4: Power |
| 5 | Sensor 4: Input |
| 6 | Sensor 4: Gnd |
| Terminal Block TB3 (Sensor Inputs 5 and 6) | |
|---|---|
| Pin | Description |
| 1 | Sensor 5: Power |
| 2 | Sensor 5: Input |
| 3 | Sensor 5: Gnd |
| 4 | Sensor 6: Power |
| 5 | Sensor 6: Input |
| 6 | Sensor 6: Gnd |
| Terminal Block TB4 (Sensor Inputs 7 and 8) | |
|---|---|
| Pin | Description |
| 1 | Sensor 7: Power |
| 2 | Sensor 7: Input |
| 3 | Sensor 7: Gnd |
| 4 | Sensor 8: Power |
| 5 | Sensor 8: Input |
| 6 | Sensor 8: Gnd |
| Terminal Block TB5 (Power and Commons) | |
|---|---|
| Pin | Description |
| 1 | Vin (5 to 24VDC) Only necessary if not connected via USB. |
| 2 | GND Only necessary if not connected via USB. |
The following picture shows how to hook the logger to a VH400 soil moisture sensor.
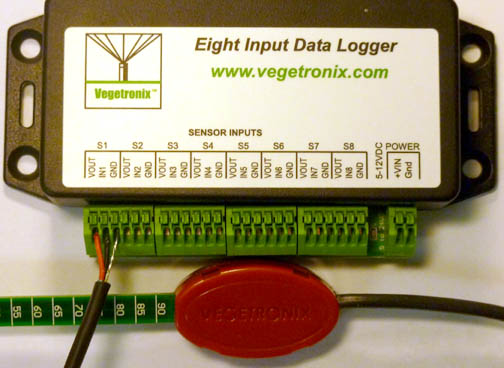
LOGGER8 Connected to a VH400 Soil Moisture Sensor.
(Sensor sold
separately)
Firmware Upgrades via USB Port
The reader's firmware may be easily upgraded as new firmware versions become available. To upgrade the reader. Open up the reader box, and set the 2 jumpers on the board. Download the latest firmware and the VegeUpdater.exe program. Connect the reader to the USB port, and run the VegeUpdater.exe program in Windows. Remove the jumpers, and close up the box.
Trouble Shooting
| Problem | Solution |
|---|---|
| The battery is wearing down after a couple of days. | Turn off the blinking LED. |
| The logger doesn't responding to commands. | Make sure you are only sending a Carriage Return <CR>, and not also a Line Feed <LF>. Many comm programs will automatically append a LF to every CR. Make sure this option is turned off. |
| The logger doesn't responding to commands. | Make sure you have selected the correct Comm Port. Open windows device manager, and make sure that the logger is listed under the ports section of the device tree. |
| Random characters or gibberish are displayed on the screen. | Make sure you have the right baud rate selected. |
Data Logger Battery Considerations
If you intend on powering the VegeHub from a battery, battery selection is very important. Not all batteries types act the same in different environmental conditions. For example alkaline batteries do not do well in cold temperatures.
For temperature extremes Lithium Ion batteries are best, with a typical range of -40°C to 60°C. If you need off the shelf disposable batteries we recommend Energizer Ultimate Lithium batteries. Their 9V battery has a 700mAh capacity, and their AA have a 3500mAh capacity. If you use the AA batteries you will need at least a quad AA battery holder to supply 6V or higher to power the VegeHub.
Rechargeable 3.7V Lithium Ion 18650 batteries are also a good choice, for environmental extremes, and for long life. Two batteries in series is sufficient to power the VegeHub.
Because batteries off-gas acid, especially in hot environments, never place batteries inside the VegeHub enclosure, as this will corrode and destroy the electronics, over time.
Battery Life Calculations
Battery life depends on numerous factors including, sample rate, number of sensors, sensor power on time, sensor power, and the sleeping power of the logger. Depending on how much power is used each day you can compute the capacity of your batteries. Batteries are rated in mA-hours which is roughly speaking the number of hours the battery will run when dissipated by 1mA. To calculate the proper battery size, and the number days a battery will last you can use an online calculator to estimate it: Battery-Life-Calculator.
It's always wise to leave extra margin by using a larger battery capacity than estimated.
Wireless Options
Our LOGGER8-RS232 can be connected to any point to point RS232 wireless modem. See the product page for LOGGER8-RS232 for details.
How to Get Started
The best way to get started is to order a reader board and a few soil moisture probes and try them out in your application.