Smart Plant Monitoring with Home Assistant: Soil Moisture Sensors + ESP32 + WLED LED “Health Bars”
Plants are terrible at communicating. Too little water and they die. Too much water… they also die. So instead of guessing, I built a plant monitoring system that turns soil moisture into numbers, and then turns those numbers into color-coded LED “health bars” under each plant.
This project uses Home Assistant as the brain, an ESP32 running WLED to drive RGB LEDs, and soil moisture sensors feeding data into Home Assistant so the LEDs update automatically.
What You'll Build
You'll end up with one LED segment per plant. Each segment shows the plant's “comfort level” based on soil moisture: brighter (or “fuller”) means happier, dimmer means it's time to water.
- Home Assistant collects soil moisture data over WiFi
- A template sensor converts raw readings into usable moisture values
- An automation maps that value to an LED segment intensity
- WLED displays the result as a simple, glanceable health bar
Parts List
- Home Assistant (I run mine on a Raspberry Pi)
- ESP32 (to run WLED)
- WLED-compatible RGB LED string/strip (addressable LEDs)
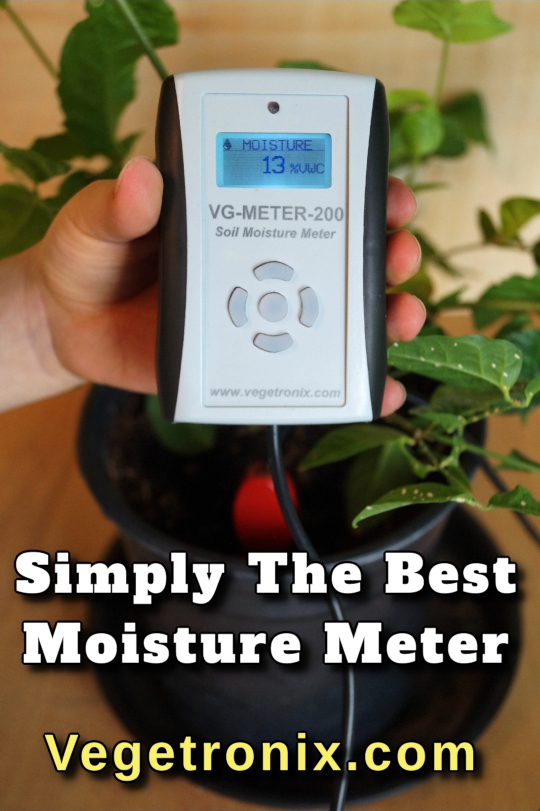
- Soil moisture sensor(s) (VH400 recommended)
- VegeHub WiFi sensor hub
- Power: LED supply + 5V for ESP32 (often via a 12V→5V regulator)
- Wire, soldering gear, and basic mounting materials
Why Home Assistant?
When I start thinking about automation, my first stop is Home Assistant. It's basically a central nervous system for your house: sensors report in, automations decide what happens next, and formerly independent devices become useful together.
Running Home Assistant on a Raspberry Pi keeps it cheap, quiet, and easy to leave running forever.
Step 1: Set Up WLED on an ESP32
WLED is open-source firmware that turns an ESP32 into a powerful LED controller. The best part: Home Assistant can detect WLED automatically and control it natively.
- Flash WLED onto your ESP32 using the official web installer (plug in the ESP32 and follow the prompts).
- Connect the ESP32 to the same WiFi network as Home Assistant.
- In Home Assistant, add the WLED device when it appears as a discovered integration.
Basic Wiring Notes (Don't Skip This)
The ESP32 runs on 5V. Many LED strings/strips run on 12V. If you're powering both:
- Use a regulator to convert 12V → 5V for the ESP32 (if needed)
- Power LEDs with their required voltage (e.g., 12V)
- Always connect grounds together (ESP32 GND ↔ LED GND ↔ power supply GND)
For the data line, connect the LED data input to your chosen ESP32 GPIO pin (example: GPIO16). Check your exact ESP32 board pinout and your LED type's wiring requirements.
Step 2: Segment the LEDs (One Segment per Plant)
If you want multiple plants on one LED string, create segments in WLED. For example, with a 50-LED string you might do three groups of 15 LEDs, leaving a few LEDs between groups so you can space plants out physically later.
- Open the WLED web UI.
- Go to Segments.
- Create one segment per plant (set start/end LED index for each segment).
- Name segments clearly (Plant 1, Plant 2, Plant 3…).
Pro tip: this is the stage where you're required to get distracted by WLED effects and colors. Consider it calibration.
Step 3: Get Soil Moisture Data into Home Assistant
Next you need a way for the plants to “talk.” Any WiFi-connected sensor hub that Home Assistant can read works, but I'm using a VegeHub WiFi data logger, because it is easy to set up and it is natively supported by Home Assistant. It supports lots of different sensor inputs, including the VH400 capacitive soil moisture sensor, which I recommend for this project.
Why Capacitive Moisture Sensors?
Capacitive sensors are a great choice because they don't depend on soil conductivity the way resistive sensors do.Translation: they're less likely to be thrown off by mineral content, and they don't corrode the same way. Also, your plants generally prefer not being electrocuted.
- Connect the moisture sensors to your hub/logger.
- Power it on and connect it to WiFi.
- In Home Assistant, add the integration/device and confirm you see live sensor values.
- If your hub sleeps to save battery, switch it to an “always on” mode when using wall power.
Update frequency: for testing, fast updates are fun. In real life, plants are lazy and change slowly, so once per hour is often plenty.
Step 4: Convert Raw Sensor Data into Soil Moisture % (Template Sensor)
Many sensor hubs report moisture as a raw voltage or raw ADC value. That's useful for electronics… but not for humans. In Home Assistant, create a template sensor that converts raw readings into a soil moisture percentage.
Here, I'll give you the exact transform that converts the voltage coming from a VH400 soil moisture probe into a soil moisture percentage for Home Assistant to use, but you can adapt this to whatever sensor or setup you are using.
Home Assistant template sensor example (paste into your YAML and adjust entity names):
# configuration.yaml (or a template sensor file)
template:
  - sensor:
    - name: "Plant 1 Soil Moisture"
      unit_of_measurement: "%"
      state: >
        {% set v = states('sensor.data_logger_input_1') | float(0) %}

        {% if v <= 0.0 %}
            0

        {% elif v <= 1.1 %}
            {{ (v - 0.0) / (1.1 - 0.0) * (10 - 0) + 0 | round(1) }}

        {% elif v <= 1.3 %}
            {{ (v - 1.1) / (1.3 - 1.1) * (15 - 10) + 10 | round(1) }}

        {% elif v <= 1.82 %}
            {{ (v - 1.3) / (1.82 - 1.3) * (40 - 15) + 15 | round(1) }}

        {% elif v <= 2.2 %}
            {{ (v - 1.82) / (2.2 - 1.82) * (50 - 40) + 40 | round(1) }}

        {% elif v <= 3.0 %}
        {{ (v - 2.2) / (3.0 - 2.2) * (100 - 50) + 50 | round(1) }}

        {% else %}
            100
        {% endif %}
Notes:
-
Replace
sensor.data_logger_input_1with your actual raw sensor entity. - Repeat for Plant 2 / Plant 3, or use a more advanced templating approach if you like.
Step 5: Turn Moisture into a “Comfort Level” (Another Template)
A plant doesn't need to reach 0% moisture to be “too dry”—it's already in trouble way before that. So I define a comfort range (example: 25%–60%) and map it to a clean 0–100 “comfort” value.
template:
    - sensor:
        - name: "Plant 1 Comfort"
        unit_of_measurement: "%"
        state: >
        {% set moisture = states('sensor.plant_1_soil_moisture') | float(0) %}

        {# Tune these two thresholds for your plant and pot size #}
        {% set dry = 25 %}
        {% set wet = 60 %}

        {# Map moisture into a 0-100 comfort band #}
        {% if moisture <= dry %}
        0
        {% elif moisture >= wet %}
        100
        {% else %}
        {{ ((moisture - dry) / (wet - dry) * 100) | round(0) }}
        {% endif %}
That comfort value becomes the brightness (or “fill amount”) of the plant's LED segment.
Step 6: Automate the LED Segment Updates
Now the fun part: when the plant comfort value changes, Home Assistant sends a command to WLED to update the segment. There are a few ways to do this (light service calls, WLED effects, segment controls), depending on how you want it to look.
Here's the YAML for the automation I set up, but feel free to adapt it to whatever works for you. Make sure that you name your sensors and entities to match what you have set up.
automation:


alias: Plant 1 Health Bar
description: ""
triggers:
  - trigger: state
    entity_id:
      - sensor.plant_1_comfort
conditions: []
actions:
  - action: number.set_value
    target:
      entity_id:
        - number.wled_intensity
    data:
      value: "{{ (states('sensor.plant_1_comfort') | float(0)) | round(0) }}"
  - action: light.turn_on
    target:
      entity_id:
        - light.wled
    data:
      brightness: 255
      effect: Percent
mode: single
Important:
- This example sets overall brightness. If you want per-segment control, configure WLED segments and use segment-aware controls.
- Depending on your Home Assistant + WLED setup, you may use different services/entities for segment updates.
- Once you get one plant working, duplicating it for the others is straightforward.
Step 7: Make It Look Good (The “Health Bar Platform”)
You could just pile LEDs on the plants… but it's cooler if you mount them cleanly. I built a simple platform so each plant sits above its own LED segment like a video game health bar.
Confession: I own a 3D printer and I love it. But for something large, a table saw and scrap wood can be the right tool. Drill LED holes, paint it black, and you're in business.
Results
Once it's set up, the system runs by itself. I don't have to remember schedules, I don't have to guess, and I don't have to think about watering nearly as often.
Where Else You Can Use This
This is a very specific setup, but the same pieces scale up easily:
- Greenhouse moisture + temperature monitoring
- Garden bed sensors and irrigation visibility
- Hydroponics system status indicators
- Terrarium or vivarium environment monitoring
- Indoor herb garden care
- Smart planter boxes
- Office plant care automation
- Plant care while on vacation
- Soil moisture monitoring for parts of your yard
- Remote monitoring for finicky plants (or a giant pumpkin)
- Any project where you want real-world data turned into simple, glanceable status
Wrap-Up
Was it a lot of effort just to avoid watering plants? Maybe. But the important thing is that it works—reliably—and now I don't have to think about it.