VegeHub (Gen 2) - Quick Start Guide
Note - This is the Quick Start guide for VegeHub models Rev D2 and beyond. If your VegeHub was purchased before 2024, please see this guide instead.
For a more detailed manual on the VegeHub, see the manual page.
Before you start
- Set up an account on VegeCloud.com. You will need some access keys so that your VegeHub can talk to VegeCloud.com and send its data.
- Don't connect sensors yet. It is easier to set up a VegeHub when you have no sensors connected to it, so we recommend setting up the hub fully before connecting sensors.
- Captive Portals - A captive portal is one where you are presented with a login after you have connected to the WiFi. These are often used for large institutions, schools, or on publicly accessible WiFi networks. The VegeHub is not able to use captive portal networks, so captive portals should be avoided.
- Be mindful of the Hub's LED. It must be lit yellow (indicating that it is awake) in order to access its web interface. The VegeHub goes to sleep after five minutes of no user activity when it is in battery power mode. Pressing the on-board button once will wake it up, and it will stay awake for as long as you are interacting with it through its web interface. If the yellow LED turns off it means that the hub has gone to sleep, and you will not be able to access its web interface. If this happens, just press the button on the board to wake it up again, or power cycle it. When power cycling, remove the battery for 20 seconds before reconnecting it.
Video Guide
The simplest way to get started is by watching our Quick Start video guide, but there are written directions below.
Connect your VegeHub to VegeCloud in only 3 Min.
Quick Start Guide
Connect to WiFi
- Connect the VegeHub to power. This should be a battery or power adapter source that provides 5-12VDC and can provide at least 500mA (0.5A).
- Find the access point using a WiFi enabled device, such as a phone or tablet. The VegeHub is always broadcasting its own WiFi access point that you can connect to. It will have a unique name that is similar to Vege_XX_XX, and you should see it listed in the nearby networks on your phone or computer.
- Connect to the VegeHub with your device. When prompted for the WiFi password, use the password vegetronix (all lower case).
- Navigate to the VegeHub WiFi configuration page. Most devices will prompt you that you need to log in to the network. Click on that prompt to be directed to the VegeHub's WiFi configuration page. They may also tell you that there is no internet access on this network, and ask if you would like to remain connected. Tell your device to stay connected. If you do not receive prompts, open a web browser on your device and navigate to http://vegetronix.com/wifi_setup, which should redirect you to the VegeHub's WiFi configuration page.
- Connect the Hub to your local network.Click on the WiFi tab from the menu.
You can press the "Scan" button to list nearby networks, and then press the "Use"
button next to your network. This will automatically fill in the Network Name, then you
can input your network's password.

If desired, you can change the name of the hub, and the password for the access point. It is recommended that you change the password for the access point so that your hub is not using the default password. The new password should me at least 8 characters. Be sure to make a note of your new password so that you don't forget it.
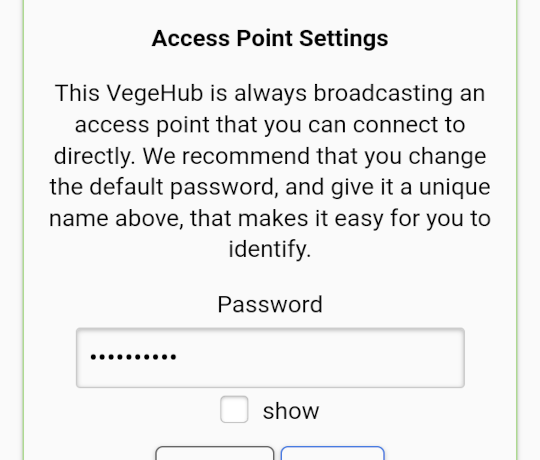
Press the "Apply" button to apply the settings.
The VegeHub will now try to connect to your WiFi network. Depending on the device you are using to connect to the VegeHub, your device may disconnect from the Hub, and you may have to reconnect. If the LED blinks red, the hub was not able to successfully connect to the WiFi network specified. Please try again, ensuring that the WiFi name and password are correct. This is a good time to power cycle your VegeHub.
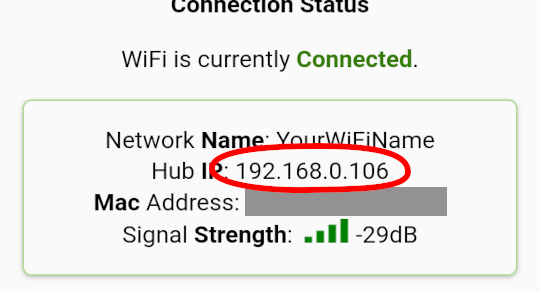
- Note the IP address. If the VegeHub was able to connect to the WiFi network, its
assigned IP address will now be displayed at the top of the WiFi configuration page. Be
sure to write down the IP
address to make it easier to remember. You can now use this IP address to
access the Hub through your local WiFi network.
-
Enter the Vegecloud "Write API Key". Create a hub in Vegecloud.com. A 16 character "Write API Key" will be created. Enter this api key into your hub's the Server settings page.
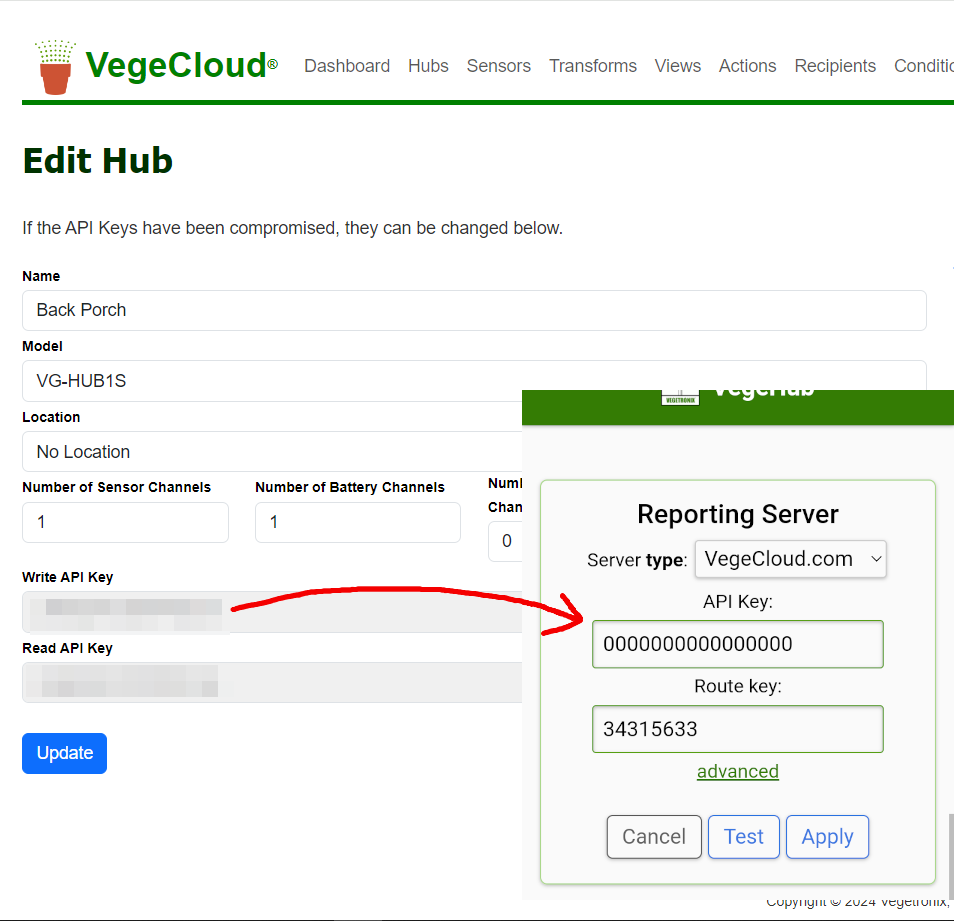
Press the "Apply" button. Your hub is now linked with vegecloud, and will send it data.
Hub Configuration
Now that your VegeHub is connected to WiFi, you can configure it through its web interface.
With the yellow LED turned on, you can type your hub's IP address into the address bar of your Chrome web browser on a computer or other device connected to your local WiFi network. This will bring up the home page of the VegeHub.
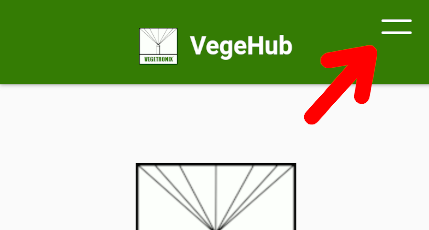
From home page of the VegeHub, you can use the menu at the top of the page to navigate to the pages specific to setting up different parts of your VegeHub, such as sensors, actuators, schedules and conditions.
See the VegeHub Manual for more detailed information on each of the hubs settings pages.